
CC-Switch One-Click Integration — QuickAPI_快快API网络商店
Foolproof operation — Just 3 steps to integrate QuickAPI with Codex, Claude Code, VSCode, and all your AI coding tools.
Step 1: Install CC-Switch
Download and install from the CC-Switch official website.
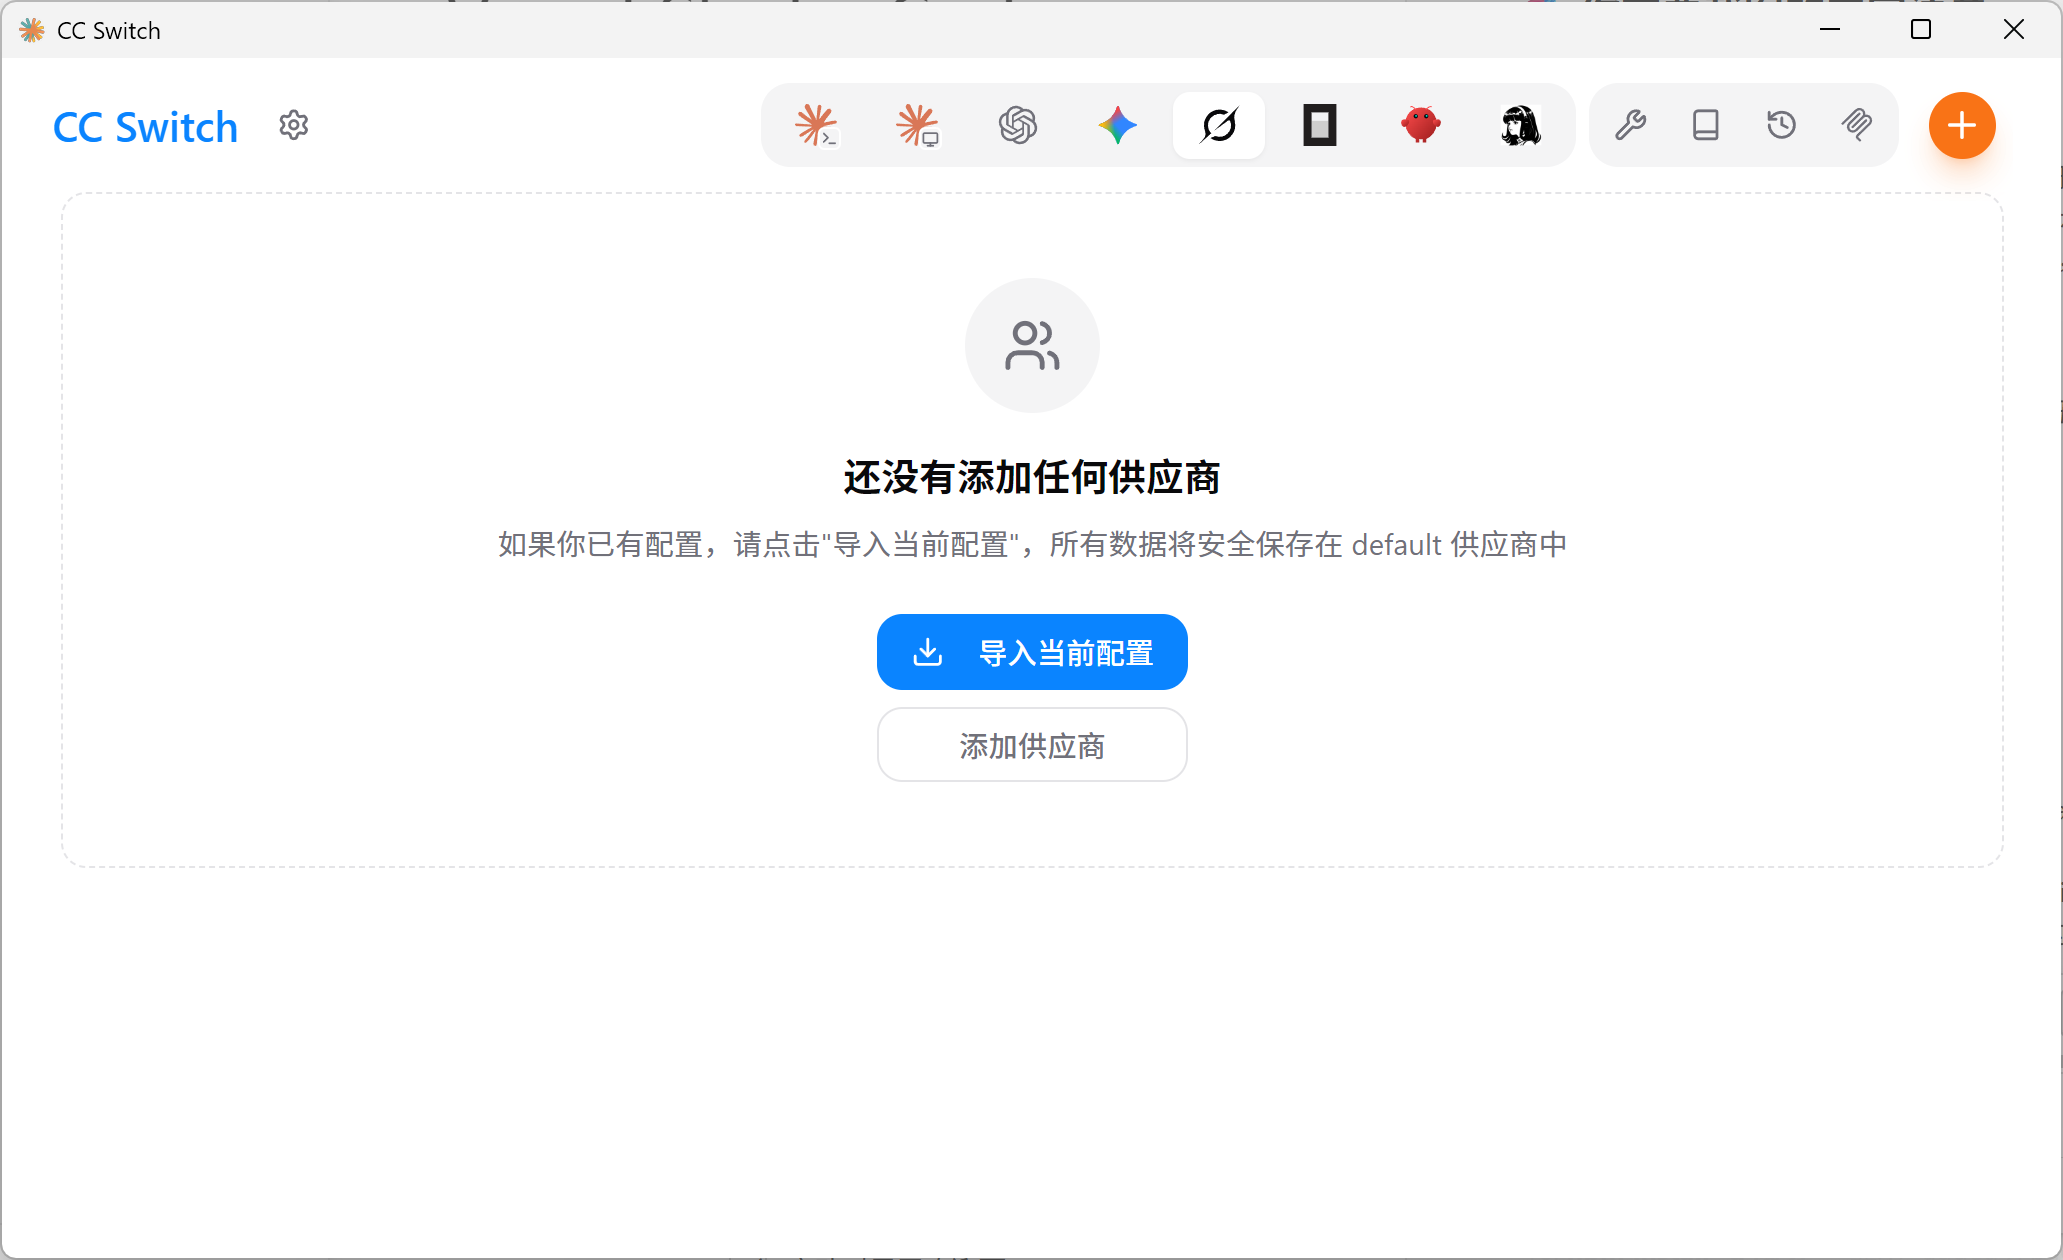
👆 This is the CC-Switch main interface. The toolbar at the top provides access to configuration, node management, and usage query features.
CC-Switch primarily supports Windows and macOS. If you're on Ubuntu/Debian (especially ROS engineers), you may not be able to install it. Please jump to the Manual Configuration Guide.
Step 2: Add QuickAPI Configuration
Open CC-Switch, click Add Configuration, and fill in:
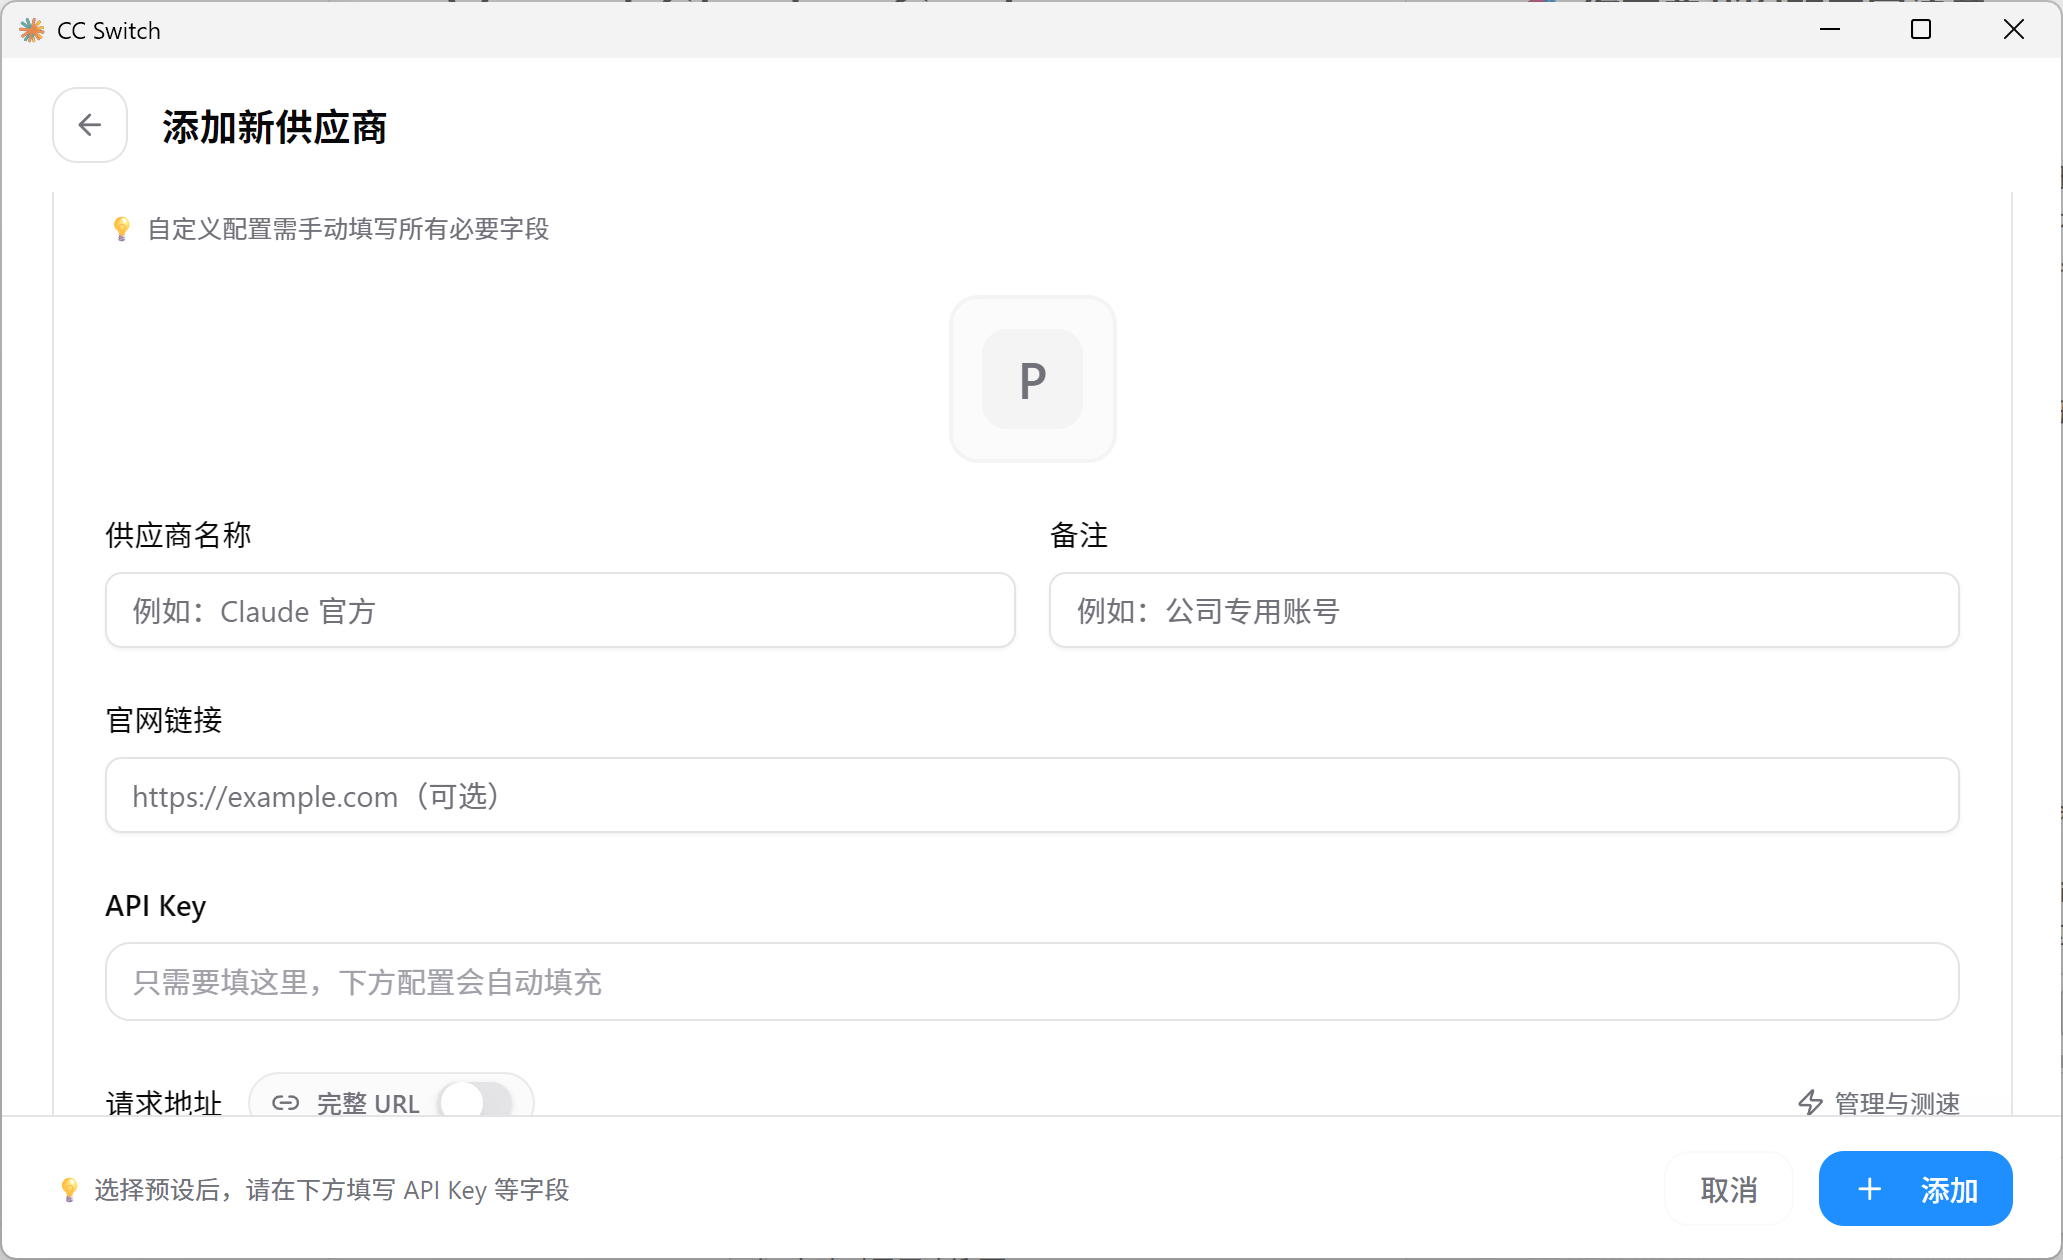
👆 Fill in the configuration form with your QuickAPI details (Name, Base URL, API Key).
| Field | Value |
|---|---|
| Config Name | QuickAPI (or any name) |
| API Base URL | https://api.quickapi.store/v1 |
| API Key | Your API Key |
| Provider | OpenAI |
Step 3: Select Your AI Tool
In CC-Switch's tool list, click the Enable button next to the tool you want to use.

👆 Select your target tool in the list, then click Enable. This is where TUI tools and desktop APP tools are managed together.
| Tool | Description | Version |
|---|---|---|
| Codex | OpenAI official AI coding assistant | TUI / APP |
| Claude Code | Anthropic official coding tool | TUI / APP |
| OpenCode | Open-source AI coding tool | TUI / APP |
| Roocode | VSCode extension | Extension |
| Codex (VSCode) | VSCode version of Codex | Extension |
| Claude Code (VSCode) | VSCode version of Claude Code | Extension |
| Copilot | VSCode Copilot (OpenAI compatible mode) | Extension |
| Hermes | Smart AI coding assistant | TUI |
| OpenClaw | Open-source AI coding tool | TUI |
| MimoCode | Lightweight AI coding assistant | TUI |
Once enabled, CC-Switch automatically configures the API address and Key for all selected tools. No manual config file editing needed.
🌐 Select Access Node (Auto Speed Test)
CC-Switch supports adding all nodes simultaneously and automatically testing to find the fastest:
Steps
- Go to Node Management in CC-Switch
- Add all 4 nodes:
| Node | URL | Description |
|---|---|---|
| Default (recommended) | https://api.quickapi.store/v1 | Nationwide |
| Beijing Node | https://api-bj.quickapi.store/v1 | North China |
| Hong Kong Node | https://quickapi.lz-0315.com/v1 | Overseas |
| IX Direct Link | https://api-bj.lz-0315.com/v1 | Equivalent to direct connection to Beijing Tencent Cloud |
- Click 🔄 Auto Speed Test
- CC-Switch tests latency for each node
- Automatically selects the fastest node after testing
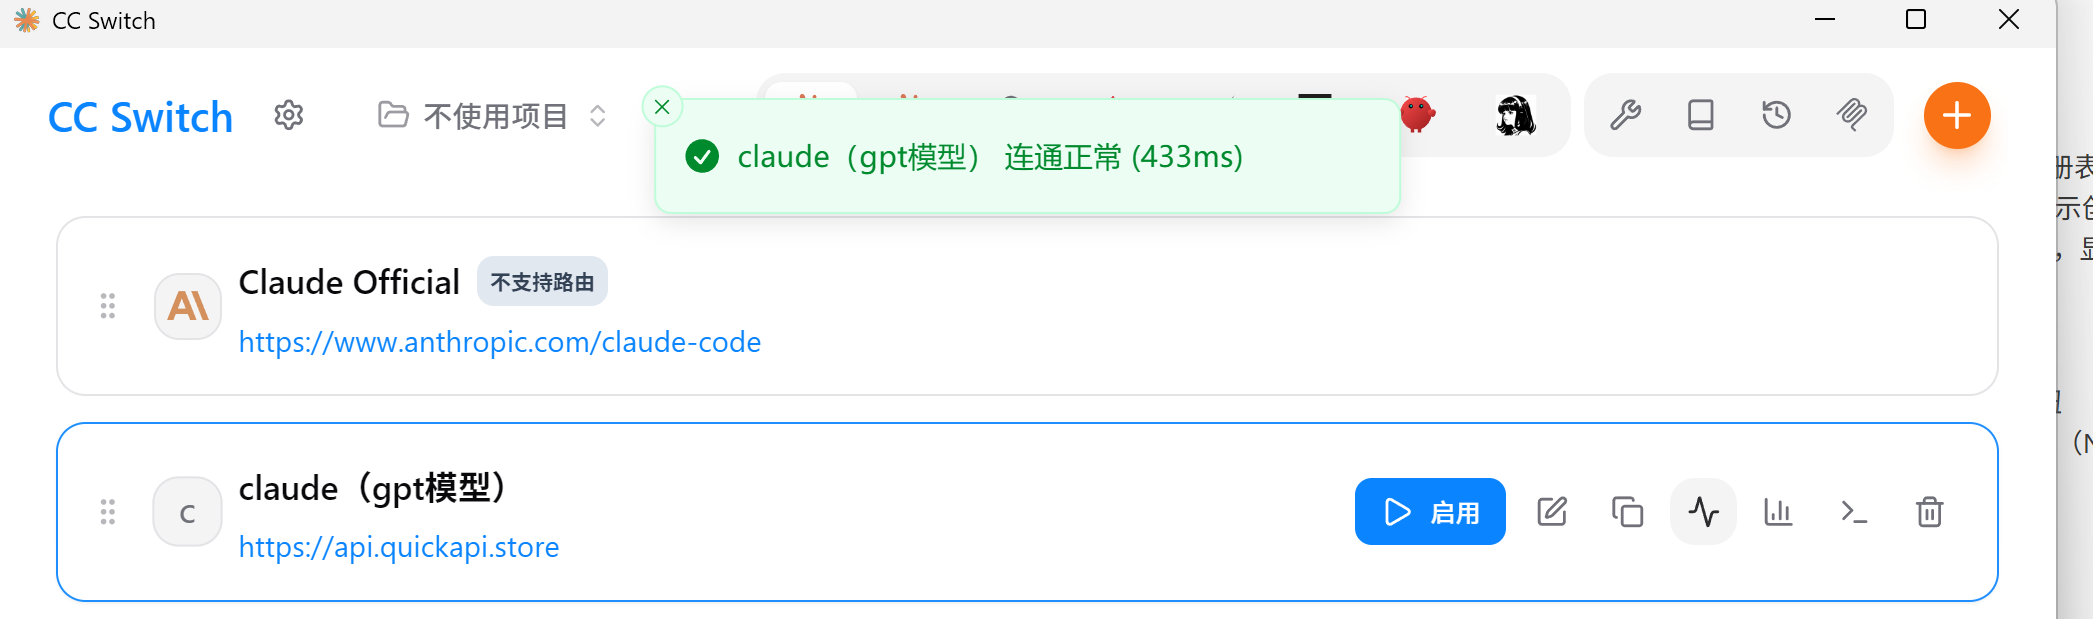
👆 After clicking Auto Speed Test, CC-Switch tests each node's latency and automatically selects the fastest one.
Enable Auto Switch feature. When the current node becomes unavailable, CC-Switch automatically switches to another available node.
📊 Usage Query & Balance Display
CC-Switch can show your account balance and usage in real-time.
| Type | Purpose | Where to Get |
|---|---|---|
| API Key | Call AI APIs | Console → API Keys |
| Access Token | Query usage/balance | Console → Personal Security Settings |
These are completely different! Do not confuse them.
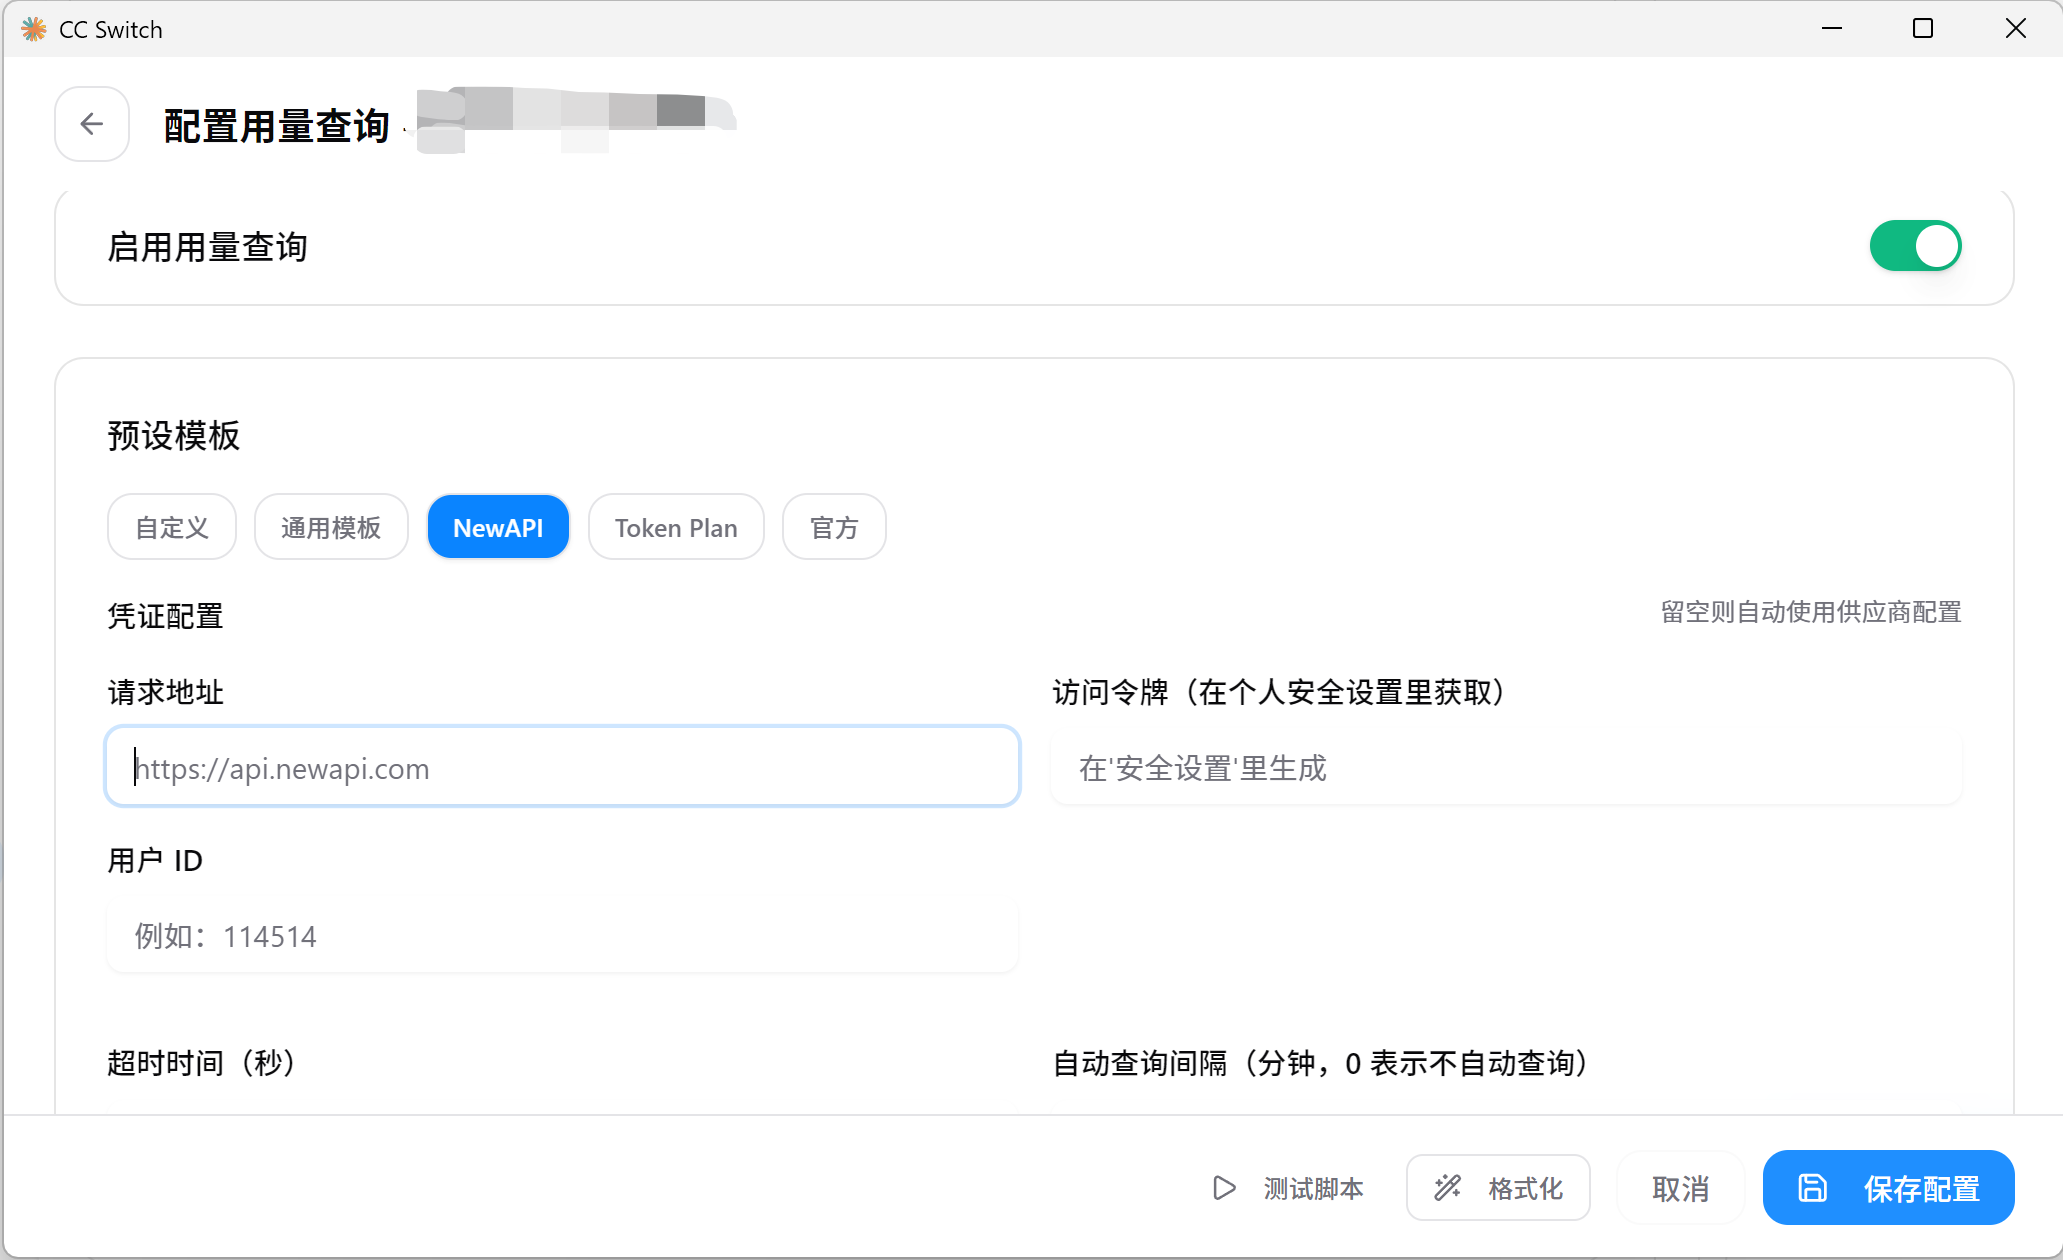
Configuration Steps
- In CC-Switch, click Usage Query → Enable
- Select NEWAPI as preset template
👆 Enable usage query and select NEWAPI as the preset template for QuickAPI balance checking.
- Access Token: Copy from QuickAPI Console → Personal Security Settings
- Paste into CC-Switch and save
🔧 Detailed Per-Tool Configuration Examples
Below are complete configuration examples for each tool. CC-Switch can automate all of this, but understanding the underlying config helps with troubleshooting.
npm / nvm Mirror Configuration (for China users)
Before installing TUI tools, configure domestic mirrors for faster downloads:
npm Mirror
# Use Taobao mirror
npm config set registry https://registry.npmmirror.com

# Verify
npm config get registry
nvm Mirror
# Set nvm mirror
export NVM_NODEJS_ORG_MIRROR=https://npmmirror.com/mirrors/node

# Windows (PowerShell)
$env:NVM_NODEJS_ORG_MIRROR="https://npmmirror.com/mirrors/node"
Codex
TUI Version
# 1. Install (using domestic mirror)
npm config set registry https://registry.npmmirror.com
npm install -g @openai/codex

# 2. Configure environment variables
# Linux / macOS
export OPENAI_BASE_URL="https://api.quickapi.store/v1"
export OPENAI_API_KEY="YOUR_API_KEY"

# Windows PowerShell
$env:OPENAI_BASE_URL="https://api.quickapi.store/v1"
$env:OPENAI_API_KEY="YOUR_API_KEY"

# 3. Launch
codex
Config File
Add to ~/.codex/config.toml:
[api]
base_url = "https://api.quickapi.store/v1"
key = "YOUR_API_KEY"
APP Version
Download from OpenAI official website, then configure in settings:
- API Base URL:
https://api.quickapi.store/v1 - API Key:
YOUR_API_KEY
Claude Code
TUI Version
# 1. Install (using domestic mirror)
npm config set registry https://registry.npmmirror.com
npm install -g @anthropic-ai/claude-code

# 2. Configure environment variables
# Linux / macOS
export ANTHROPIC_BASE_URL="https://api.quickapi.store/v1"
export ANTHROPIC_API_KEY="YOUR_API_KEY"

# Windows PowerShell
$env:ANTHROPIC_BASE_URL="https://api.quickapi.store/v1"
$env:ANTHROPIC_API_KEY="YOUR_API_KEY"

# 3. Launch
claude
Config File
Add to ~/.claude/config.json:
{
  "apiUrl": "https://api.quickapi.store/v1",
  "apiKey": "YOUR_API_KEY"
}
APP Version
Download from Anthropic official website, then configure in settings:
- API Base URL:
https://api.quickapi.store/v1 - API Key:
YOUR_API_KEY
OpenCode
TUI Version
# 1. Install (using domestic mirror)
npm config set registry https://registry.npmmirror.com
npm install -g opencode

# 2. Configure environment variables
# Linux / macOS
export OPENAI_BASE_URL="https://api.quickapi.store/v1"
export OPENAI_API_KEY="YOUR_API_KEY"

# Windows PowerShell
$env:OPENAI_BASE_URL="https://api.quickapi.store/v1"
$env:OPENAI_API_KEY="YOUR_API_KEY"

# 3. Launch
opencode
Config File
Add to OpenCode config file:
{
  "api_base": "https://api.quickapi.store/v1",
  "api_key": "YOUR_API_KEY",
  "model": "gpt-4o-mini"
}
APP Version
Download from official website, then configure in settings:
- API Base URL:
https://api.quickapi.store/v1 - API Key:
YOUR_API_KEY
VSCode Extensions
Roocode
{
  "roocode.apiBaseUrl": "https://api.quickapi.store/v1",
  "roocode.apiKey": "YOUR_API_KEY",
  "roocode.model": "gpt-4o-mini"
}
Codex (VSCode)
{
  "codex.apiBaseUrl": "https://api.quickapi.store/v1",
  "codex.apiKey": "YOUR_API_KEY"
}
Claude Code (VSCode)
{
  "claude.apiBaseUrl": "https://api.quickapi.store/v1",
  "claude.apiKey": "YOUR_API_KEY"
}
VSCode Copilot (OpenAI Compatible Extension)
{
  "copilot.openai.apiBaseUrl": "https://api.quickapi.store/v1",
  "copilot.openai.apiKey": "YOUR_API_KEY",
  "copilot.openai.model": "gpt-4o-mini"
}
Hermes
Environment Variables
# Linux / macOS
export OPENAI_BASE_URL="https://api.quickapi.store/v1"
export OPENAI_API_KEY="YOUR_API_KEY"

# Windows PowerShell
$env:OPENAI_BASE_URL="https://api.quickapi.store/v1"
$env:OPENAI_API_KEY="YOUR_API_KEY"
Config File
Create or edit config.json in Hermes config directory:
{
  "api_base": "https://api.quickapi.store/v1",
  "api_key": "YOUR_API_KEY",
  "model": "gpt-4o-mini"
}
OpenClaw
Environment Variables
# Linux / macOS
export OPENAI_BASE_URL="https://api.quickapi.store/v1"
export OPENAI_API_KEY="YOUR_API_KEY"

# Windows PowerShell
$env:OPENAI_BASE_URL="https://api.quickapi.store/v1"
$env:OPENAI_API_KEY="YOUR_API_KEY"
Config File
Edit in OpenClaw config directory:
{
  "api": {
    "base_url": "https://api.quickapi.store/v1",
    "api_key": "YOUR_API_KEY"
  }
}
MimoCode
⚠️ Platform-Specific Installation
MimoCode requires platform-specific packages. Before configuring, install with the correct command for your OS:
| Platform | Install Command |
|---|---|
| Windows | npm install -g @mimo-ai/cli @mimo-ai/mimocode-windows-x64 |
| GNU/Linux | npm install -g @mimo-ai/cli |
| macOS | npm install -g @mimo-ai/cli |
| Unix | Official Unix installation method is not documented. Please contact quickapi@lz-0315.com for support. |
Environment Variables
# Linux / macOS
export OPENAI_BASE_URL="https://api.quickapi.store/v1"
export OPENAI_API_KEY="YOUR_API_KEY"

# Windows PowerShell
$env:OPENAI_BASE_URL="https://api.quickapi.store/v1"
$env:OPENAI_API_KEY="YOUR_API_KEY"
Config File
Add to MimoCode config file:
{
  "api_base": "https://api.quickapi.store/v1",
  "api_key": "YOUR_API_KEY",
  "model": "gpt-4o-mini"
}
More Application Integrations
In addition to the AI coding tools listed above, QuickAPI also supports the following applications and platforms:
| Application | Type | Description |
|---|---|---|
| AionUi | Desktop Office Agent | Free open-source Cowork with multi-model support, file management, and real-time preview |
| Cherry Studio | Desktop AI Client | Powerful AI assistant client with multi-model conversation support |
| DeepChat | AI Agent Client | Open-source full-featured AI Agent client |
| Memoh | AI Agent Platform | Containerized AI agent platform, each bot runs in an independent container with long-term memory and multi-channel access |
| FluentRead | Translation Plugin | AI-driven smart reading and translation assistant |
| LangBot | Chatbot Framework | LLM-based chatbot development platform with instant messaging support |
| LunaTranslator | Translation Tool | Real-time translation tool for games and documents |
| AstrBot | Agent Chatbot | Open-source all-in-one Agent chatbot platform |
| Factory Droid CLI | Automation Workflow | AI agent tool for automated workflows |
General Integration Method
Most applications only need the following information to connect to QuickAPI:
| Config Item | Value | Description |
|---|---|---|
| API Base URL | https://api.quickapi.store/v1 | Default access address |
| API Key | Your API Key | Get from console |
| Model Name | Refer to Model Plaza | Real-time model list |
Refer to each application's official documentation for specific configuration steps. If the application supports OpenAI compatible mode, it can directly connect to QuickAPI.
❓ FAQ
Q: Do I need to configure each tool separately?
A: No! CC-Switch configures all tools with one setup.
Q: Which models are supported?
A: All OpenAI and Anthropic compatible models. Visit Model Plaza for the real-time list.
Q: How do I choose the best node?
A: Add all 4 nodes in CC-Switch, click Auto Speed Test, and it picks the fastest.
Q: Where do I get my API Key?
A: Log in to QuickAPI Console → API Keys page.
Q: Where do I get my Access Token?
A: Log in to QuickAPI Console → Personal Security Settings. Note: Access Token ≠ API Key!
Q: Any payment notes?
A: Payment must use https://api.quickapi.store. Only this address is verified with the payment gateway.
Q: My Linux machine can't install CC-Switch. What do I do?
A: Please refer to the Manual Configuration Guide and edit config files directly.
Q: npm installation is slow?
A: Configure Taobao mirror: npm config set registry https://registry.npmmirror.com
Q: nvm downloading Node.js is slow?
A: Set mirror: export NVM_NODEJS_ORG_MIRROR=https://npmmirror.com/mirrors/node